Featured in the New York Times and ideas you can steal at home
Since I last wrote, I’ve been lucky enough to be featured in the New York Times talking about Montessori. It’s been so exciting to see Montessori in the mainstream media at last.
If you missed it, here’s a link to the article: “Can a Playroom Makeover Make My Kids Over?” by Karen Barrows.
“Just as Marie Kondo is helping people declutter and organize, Ms. Davies helps parents turn homes into places that are more functional for the family, instil autonomy in the smallest members of the household and create a greater sense of peace — all in the Montessori spirit.” (New York Times)
So I thought it would be fun to give you a look behind the scenes. Plus you can steal all these ideas for your own home! Enjoy.
1. How it happened
The lovely team at Workman Publishing had the idea to do a Montessori makeover to help promote the book being launched into Amazon and all book stores. I was the sceptical one. “But Montessori is more about just making spaces pretty,” I thought.
But when the pitch got picked up by the New York Times, you know they are also going to explore the “why” behind setting up a home in this way.
An editor at the New York Times bravely put herself forward for me to tackle the playroom for their 3 children, aged 1, 4 and 7. I was sent some photos of the space I’d be working on, had an 18-minute phone call with her, and then on the day of the makeover I was to just use the things they had available to makeover the space and, due to the full book tour schedule, I had just a 4-hour window to make it happen.
2. The day
The morning of the makeover, we had a fun road trip down to New Jersey with Lathea (the lovely publicist at Workman Publishing) and my sister, Tania. I was so grateful for the extra hands.

While I got busy pulling out everything from the closet to sort things and see what was available, my sister was in charge of some painting and Lathea taking notes.
By the third hour I could see everyone was getting tired, especially the poor mother who’d had to answer a lot of questions from me as well as being non-stop busy finding useful things for me, moving things in and out of the space, whilst also helping her understand the changes I was making to their home.
The last push, getting everything in its place, Tania (a born-Virgo) rearranging the storage to make things easy to see for rotation later, and final photos taken. We did it!
3. First impressions
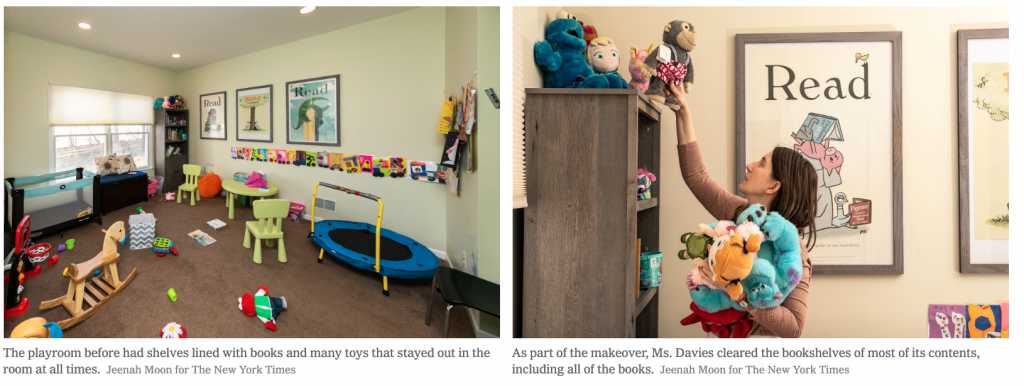
My impression of the space when I first arrived was that there was actually not so much clutter in their home. It was a pretty organised space.
The area that I thought I could add most value was to make things more easily accessible and more attractive to the children. Imagining myself as one of their children, it wasn’t immediately obvious what I’d play with when I walked into the room. Things seemed to be more at adult height than set up for young children. And not many things available for the 1-year-old to access without someone getting something for him.
Additionally, the room felt a little busy with artwork, noticeboards, full bookshelves, and a big plastic box of marker pens that even I couldn’t get open without asking for help. So adding some calm to the space would be a big part too.
4. The changes I made – ideas you can steal at home
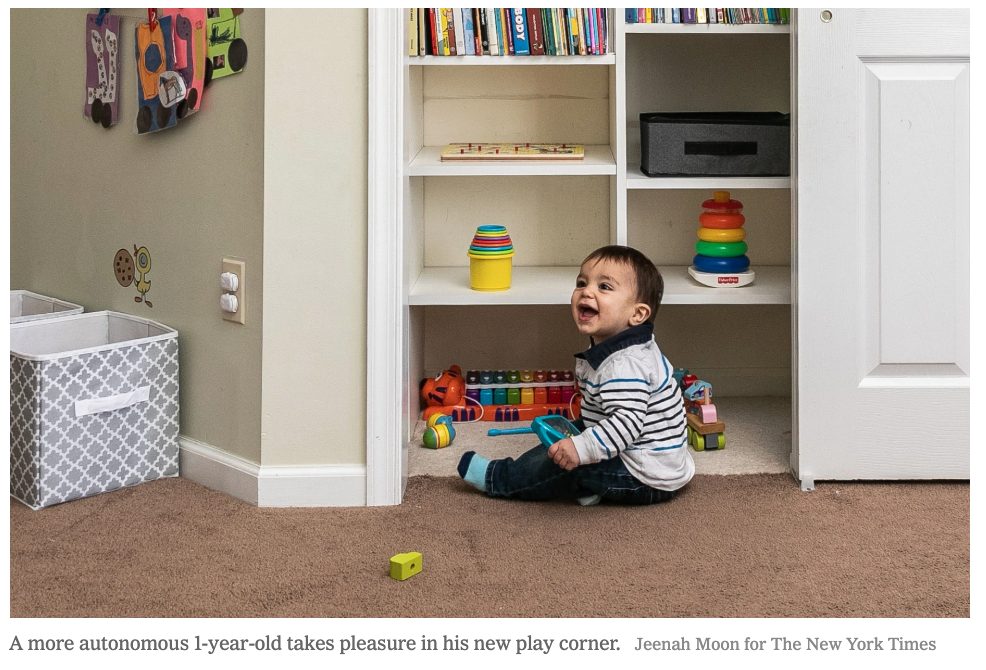
I proposed that we would use the bottom section of the cupboard as low shelves for the 1-year-old. I would even have taken off the cupboards at the bottom of the book shelf to help young children be able to access things, but this was someone else’s home!
1. The book corner
I love having books available in children’s spaces. In fact I love books everywhere when they are attractively displayed.
However, the bookshelf in the corner of the playroom was the only space we could use for some shelving for the older children and also made the space very top heavy, with the books not so easy to reach and the books difficult to pull out.
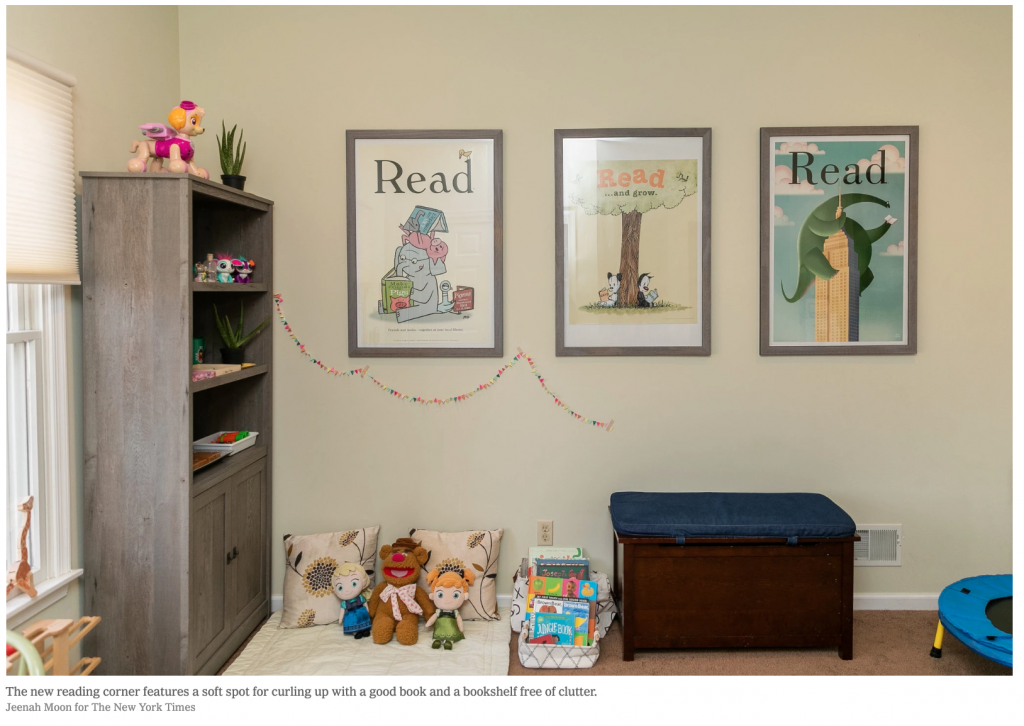
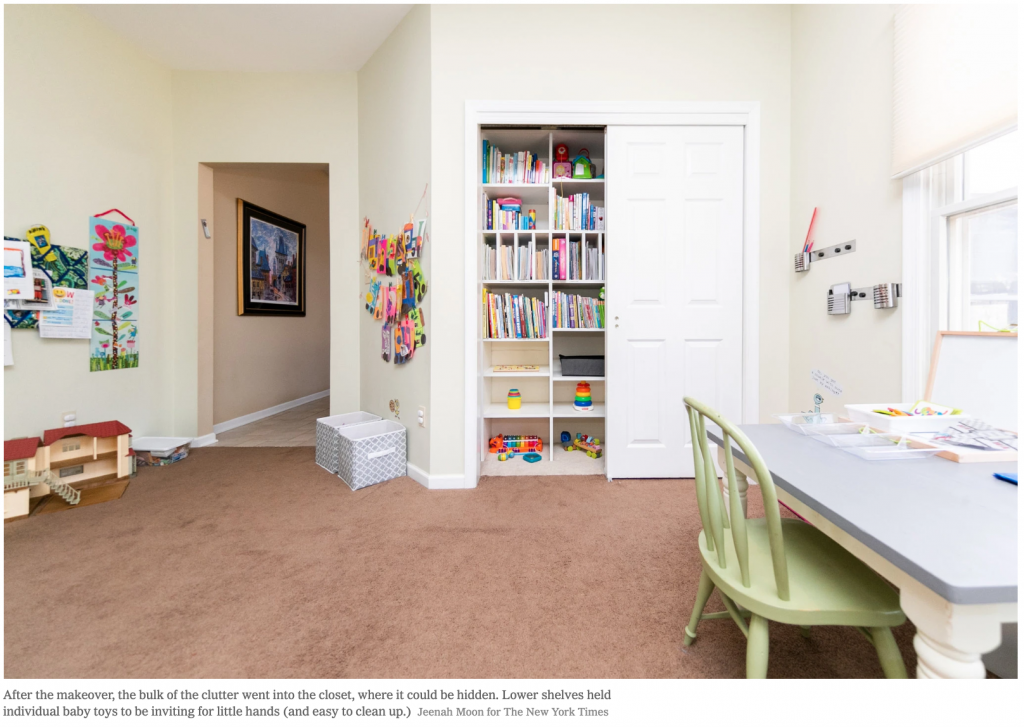
So, radically, I chose to store most of the books inside the sliding cupboard and just chose a selection of books that seemed age-appropriate and/or seasonal. One book basket for the 4- and 7-year-old, and one book basket for the 1-year-old (about 5 books in each). Then they can see when these books needed to be rotated to keep it interesting and engaging and the older children can help make the selections too.
We found some old cushions and an old baby blanket flipped to the reverse side (always look at what you already have!) which marked the space for a cosy book spot, and a little bit of bunting on the wall, subtly hung to make the little space even more inviting.
2. Bring everything down low
I’m not sure if you have noticed, but our children (most often) are surrounded by large adult-sized furniture and things set up for adults rather than children. We make everything child-safe and put everything out of reach.
Go sit on the ground in your living room. How does it feel from the child’s height?
When I was in this playroom, I wanted to bring everything down to the children’s height. The already tall bookshelf had soft toys on top, making it even higher. To a small person, this can feel like a lot.
So, again, I pulled down the display of soft toys, stored most in the cupboard, and kept out a few current favourites. These can be rotated as desired and I’m sure there will be some days when they will all be pulled out as well. And that’s fine too.
There were noticeboards and artwork displays that were quite high too. So I moved these down, removed the quantity to make nice displays, and hung baking twine at their height with pegs as an improvised display area that the children can use themselves to display their favourites.
3. Remove things that are no longer needed
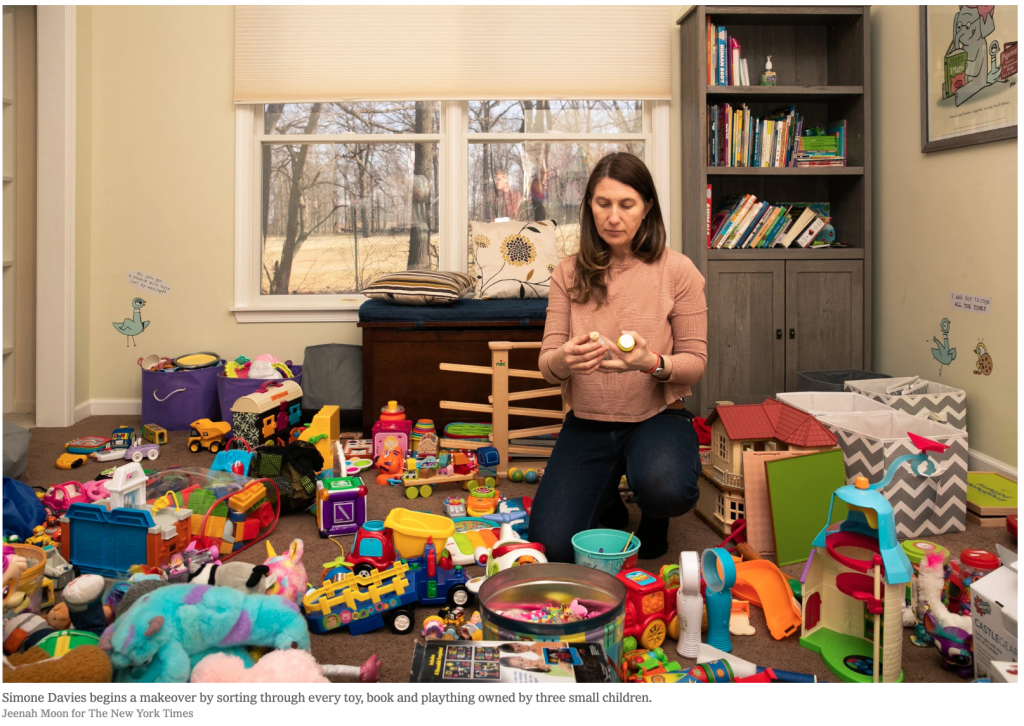
A big part of the makeover was clearing out things that were no longer needed. I like to take everything out of the storage and sort things into piles (for example, vehicles, sets of toys etc) so I can see what there is. For others who like to do things more moderately, you can place a cardboard box in the corner of the room for things that can find a new home or be stored for a younger child in the family which you can add to during the week and then clear it out once it is full.
There were some baby rattles and toys that the 1-year-old had grown out of and were set aside to pass on to another family. Broken toys or toys with (critical) missing parts were also removed. And we found a lot of parts which had been missing which was very satisfying.
Often we hold onto these things for too long and you’ll find they no longer provide enough challenge to the children. If you see your child throwing a toy, it may indeed be too easy…or too difficult and can be stored for later.
4. Store the rest
I always recommending buying less toys, but have better storage. When you keep out a limited amount of toys, it’s easier to see what is available and it’s super exciting to change things over. You get longevity from the activities and lose far less pieces as things are much more manageable.
Honestly, I thought I’d only do this while my children were small, but I ended up using this approach with my children until they stopped playing with toys in their early teenage years.
5. Make things attractive, accessible and available
I used the lower shelves in the sliding cupboard to make a few toys available for the baby – one activity per space to keep things easy to see and to manage. For the older children we displayed a couple on the book shelves, and on the table.
Perhaps over time they could look to change the shelving in the room so that the children could reach all the shelves without assistance, and use the shelves out of reach of the baby (and more difficult containers for small parts) for the older children.
We repurposed trays that they had around the home to have each activity in a tray or basket. This keeps things for the activity together, makes things easy to tidy away, and easy to manage when they want to play with it.
The colours in a playroom can get overwhelming, so I prefer to use more neutral furniture so the toys become more inviting. My sister painted a wooden table we found downstairs in a neutral grey to replace the brighter plastic table and chairs. (And my sister also kindly painted their super colourful easel a grey colour to make the space calmer yet still inviting.)
My favourite place for a table is by the window where the natural light is at its best. This made such an enormous difference to the feel of the room.
6. Add plants
Anyone who knows me knows that I love adding plants into spaces for children. Firstly it adds softness to the space. The children have something living to look after. And they learn the practical skill of watering and caring for their plants.
Win. Win. Win.
7. How can the children be independent in the space?
One thing the family was excited about was the possibility of the children being able to “play with less intervention.” To do this, we can use the space to make things inviting for the children so they want to use them, and we can make things easier for them to use by themselves.
To make the activities attractive, I set out a few age appropriate activities for each child which could be rotated. As they were in school on the day, I chose some things based on their mother’s suggestions and what I found in the cupboard. Then the idea is that you’d observe how much these take their interest and make changes where/when needed.
We set up an art area as the 4-year-old loves crafting. They had bought some metal strips with magnets and we mounted this on the wall at the child’s height to hold art materials like scissors, tape, pens, and glue at the ready (and out of reach of the baby).
And again, things like having a space for everything and everything in its space, means that the children can even easily tidy things away by themselves.
8. Less is more
I’m now well-known for saying “put out only as much as you want to clean up.” Such a simple idea, but so useful. For everything from how much water will spill from a jug, to how many lego blocks will be tipped on the floor, to how many activities are available at any one time.
In this home, they had a huge amount of Lego. I took about a quarter of these Lego pieces and placed them in a smaller box which can be changed from time to time. Additionally I took out around a quarter of the magnetic tiles they had rather than having hundreds of pieces that won’t be used.
It’s about finding the right amount and would be adjusted as your child grows – enough so that there are creative possibilities, and not too much to be overwhelming to the child (or you).
5. My favourite part
Initially I was thinking that we might be able to bring in a Montessori shelf and some wooden toys to do this makeover. And, actually, the constraint of being limited to what they had was so much more valuable and turned out to be my favourite part.
Montessori is not about buying more things. It takes some adjusting in how we include our children in our homes, keeping on top of it, and preparation at times. And now many people are able to see that they may be able to achieve the same in their own home.
The limitation of time was also a great challenge and great to see how much change you can make with not so much time or effort. This project was such a delight to work on.
6. The result
As a result of the makeover:
- the family found that the children were more capable than they expected
- they found the space calmer
- they did tell me that it did take some time to get used to the new set-up
- they would like to make a dedicated space for the older child as this space works best for the younger children
- they could add the ideas into other areas of the home, for example, setting up the kitchen for the children to be more involved, some changes to the entrance etc.
- and the best result of all was watching their youngest crawl over to the area I’d just created for him and begin exploring. So beautiful.
7. The reality
So the reality is that not everyone has a playroom or an au pair. But I do like to say that small spaces are opportunities for creativity. I was reminded of this video I made of a 50m2 apartment here in Amsterdam which might give you some creative ideas.
Additionally, setting up a playroom will not make us live a Montessori life. There are many more layers that take time to add in, the most important to me being respect for each other which is in no way covered here. And “playing” is not the whole picture. It’s also about being part of the family and living in daily life with each other.
But it’s a start.
If the article or the book help just one more family then that makes me enormously happy. And, again, it is so exciting to see Montessori in the mainstream media.
I love working with toddlers and their families, observing their fascination with the world around them, and being their guide. And for as long as that makes me happy I’m staying right here as a teacher in my classroom.
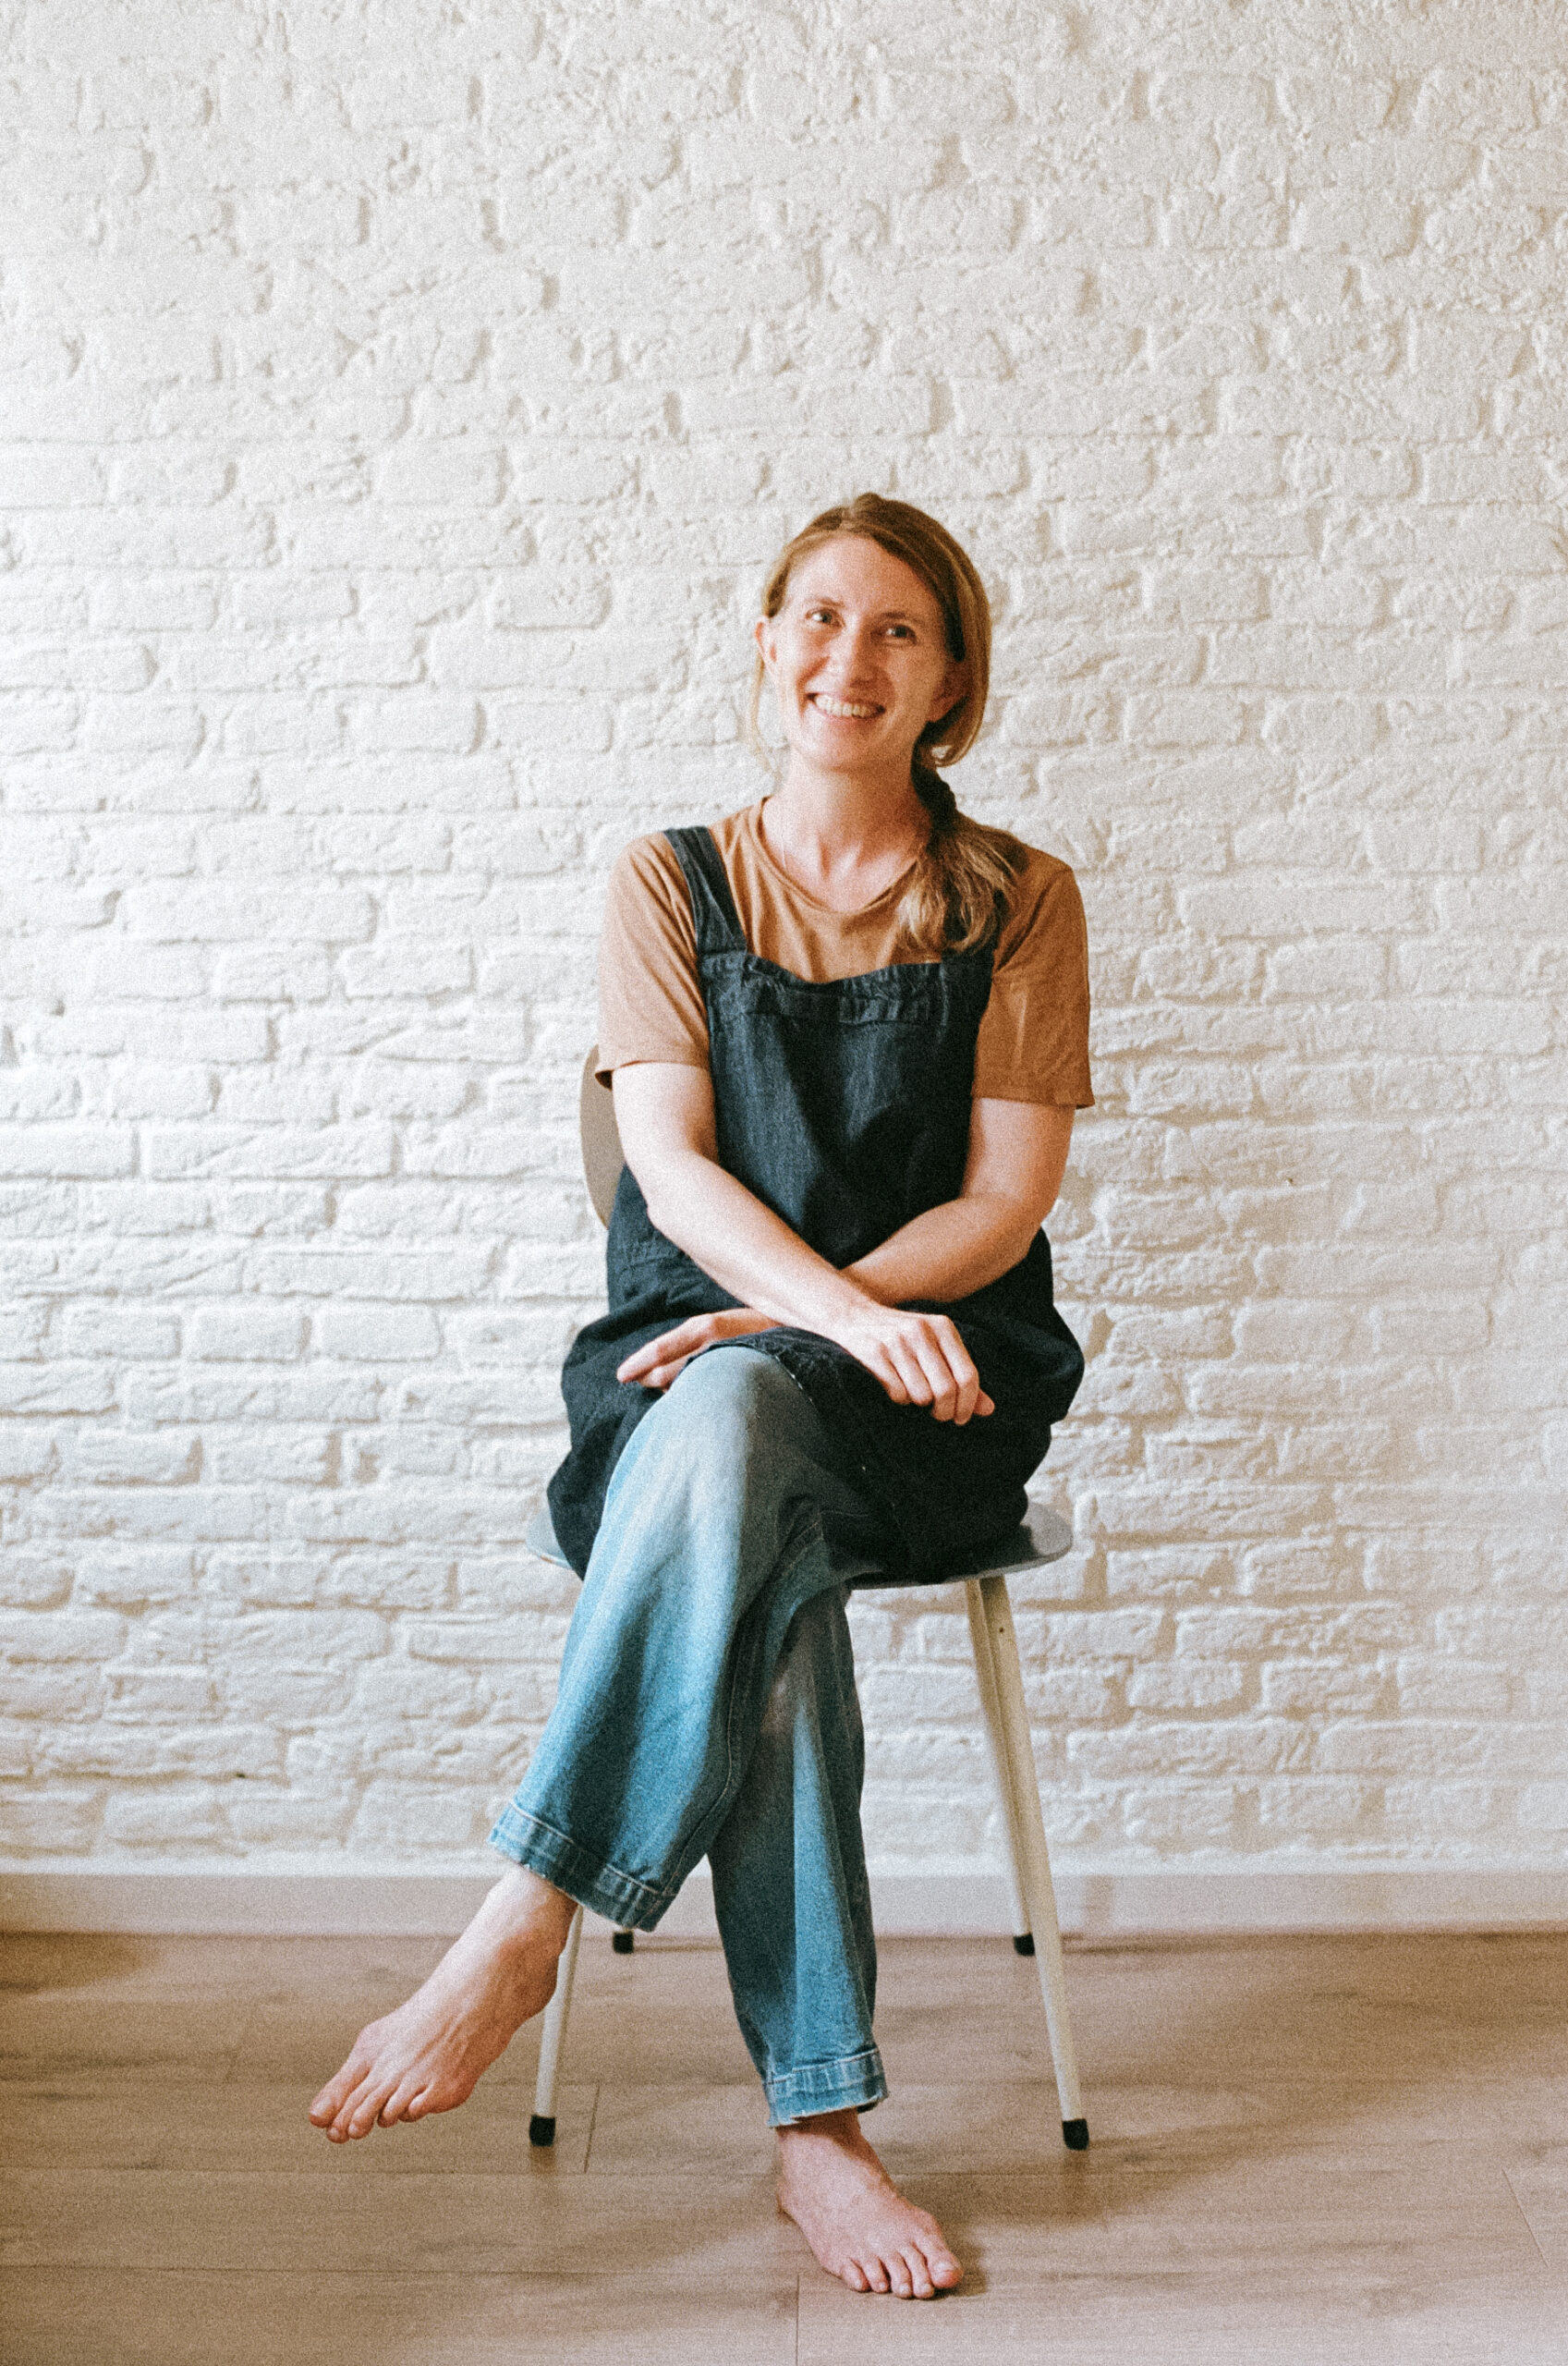
Simone Davies has more than 20 years’ experience as an AMI Montessori educator. Simone is the author of “The Montessori Toddler” and co-author of “The Montessori Baby” and “The Montessori Child” books, comprehensive guides to raising children in a Montessori way. She currently runs parent-child Montessori classes in Amsterdam at her school Jacaranda Tree Montessori. She also has a popular blog, instagram and podcast “The Montessori Notebook” and is mother to two young adults.